Bank-of-Mufasa
A simple proof of concept banking system built on Microservices Architecture
Technologies
- SpringBoot.
-
Spring Cloud : config server eureka Gateway server. - Resilience4J framework
- Spring Sleuth & Zipkin Server (Distributed tracing & log aggregation)
- Prometheus & Grafana (Monitoring) 6.`Docker
- Kubernetes : Google Kubernetes Engine
- Spring Security : Oauth2
- Helm 10.Keycloak auth server 11.Docker Hub
Pre-Usage
Shout out to EazyBytes for teaching me most of what i implemented in this project.
Getting Started
-Before running this solution you need to have docker installed in your local system.
- All the images have been uploaded to docker hub : Bank of Mufasa
- Navigate download the docker-compose file from here: Docker-compose file
- On your local environment’s terminal run ` docker run -p 7080:8080 -e KEYCLOAK_ADMIN=admin -e KEYCLOAK_ADMIN_PASSWORD=admin quay.io/keycloak/keycloak:18.0.0 start-dev ` to spin up a keycloak server on your local env.
- Now in the location of the downloaded
docker-compose file; rundocker-compose upto spin up all the microservices that power this project.
Alternatively :
-Clone the project and generate you own docker images from the following springBoot projects :
1. Accounts :
has a docker file to build its image command: mvn install + docker build . -t mufasa/accounts
2. Cards - command `mvn spring-boot:build-image`
3. ConfigServer - command `mvn spring-boot:build-image`
4. EurekaServer - command `mvn spring-boot:build-image`
5. GatewayServer - command `mvn spring-boot:build-image`
6. Loans - command `mvn spring-boot:build-image`
7. Zipkin - command `docker run -p 9411:9413 openzipkin/zipkin `
8. Keycloak server - command `docker run -p 7080:8080 -e KEYCLOAK_ADMIN=admin -e KEYCLOAK_ADMIN_PASSWORD=admin quay.io/keycloak/keycloak:18.0.0 start-dev`
- All the shared configurations are read from this repo feel free to create you own and change the location of the git server or you can leave as is i will leave the repo server active for as long as github exists
Haha. - After after you have all the docker images, run them guided by the ports defined in the application.properties file of each microservice but in the following order
zipkin->keycloak->configserver->eurekaserver->accounts->loans->cards->gatewayserverAndfelicidades!you are ready to test build more on this project !
Testing
Note:
- All the endpoints except the
loans serviceendpoints require authentication while some require authorization too. - All endpoints should go through the gatewayserver :
http://localhost:8072/mufasa/* - The endpoints have been secured using two approaches :
Oauth2 client credentials grant flowandOauth2 Authorization code grant flow. The submitted code uses the latter but you can pull this accounts image and gatewayserver image from my dockerhub to test using client credentials grant flow / clone the code from client-credentials-grantflow branch- Log in to keycloak server using the credentials you used when starting the container and do the following: ```java
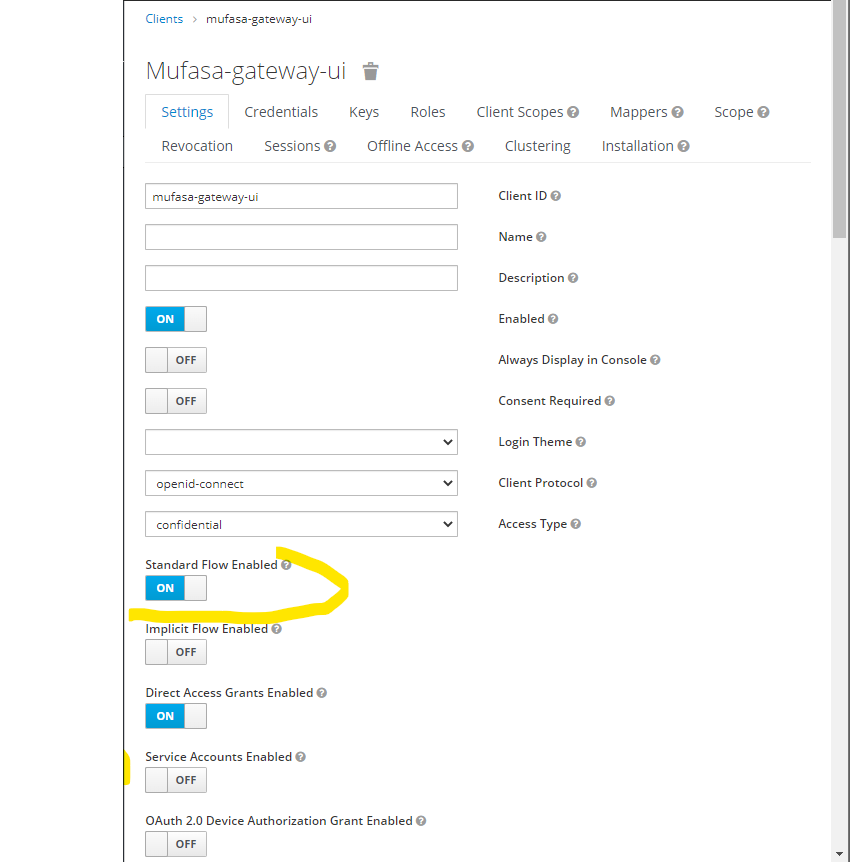
- Create two accounts : mufasa-test-environment(Oauth2 client credentials grant flow) & mufasa-gateway-ui(Oauth2 Authorization code grant flow
. The submitted code uses the latter but you can pull this [accounts microservice image) to use the former.``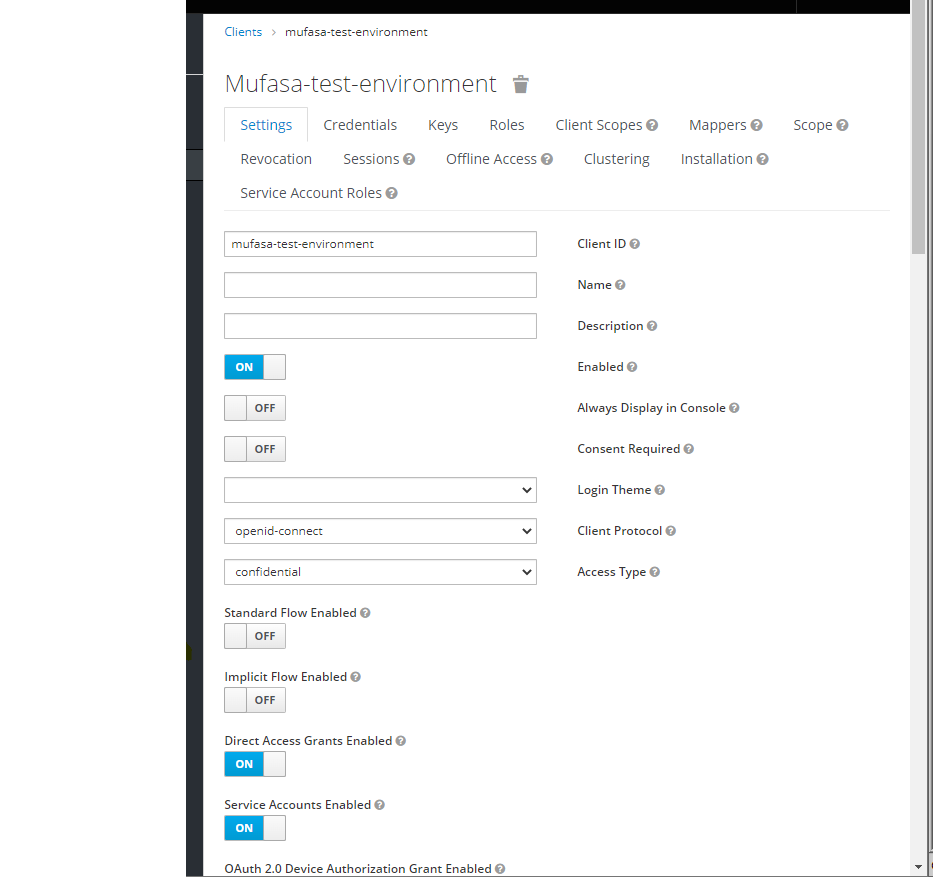
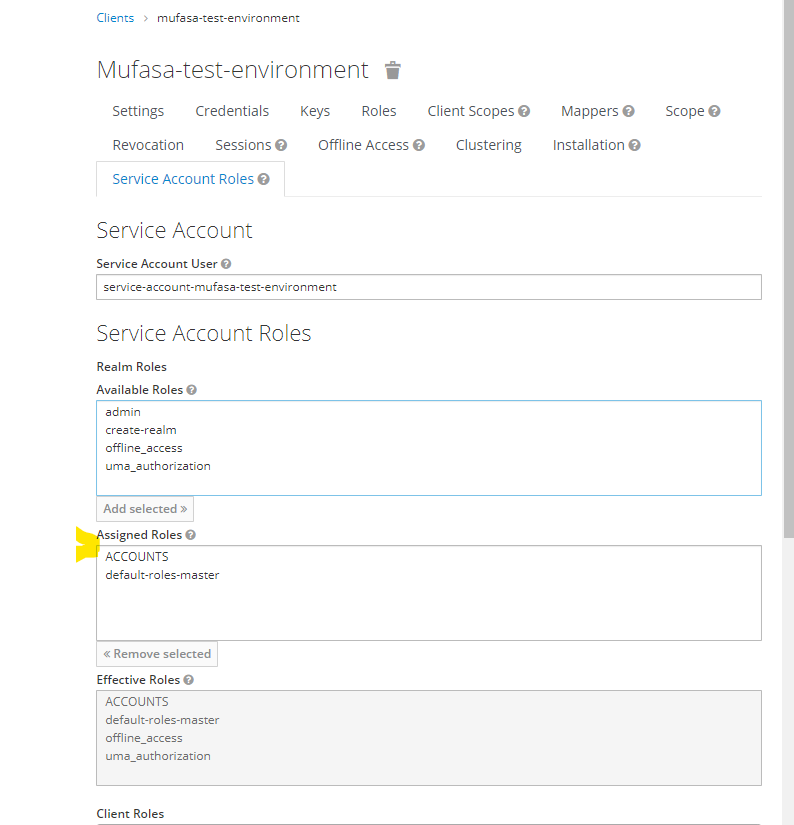
2. Create a role called ACCOUNTS and assign it to mufasa-test-environment client.
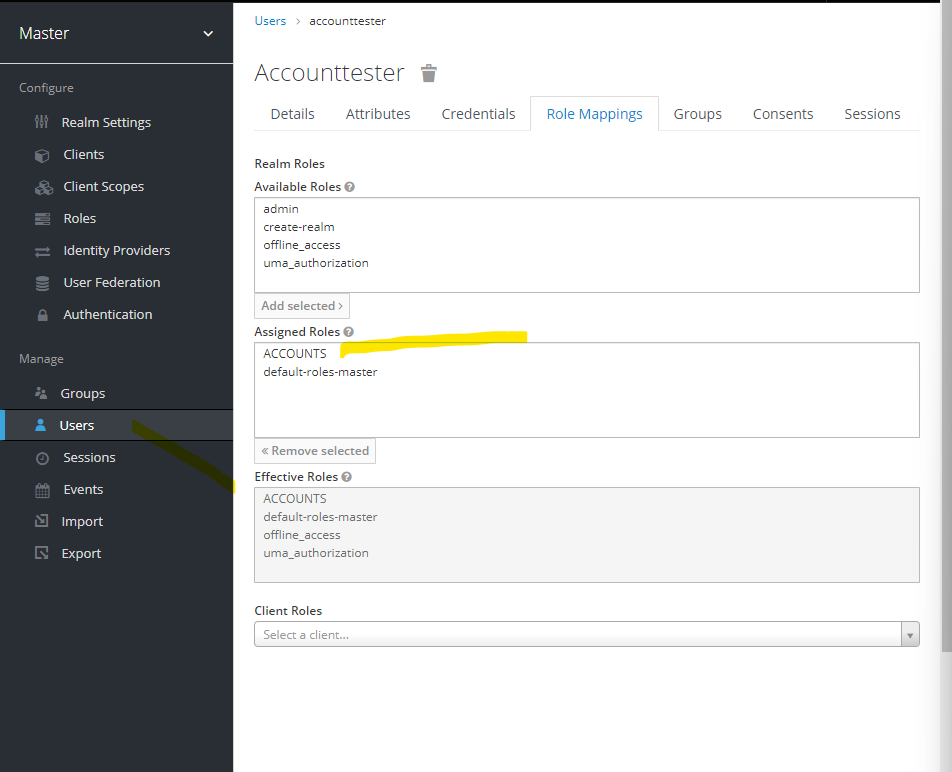
3. Create user and give them ACCOUNTS role
Testing using oauth2 client credentials grant flow
- a `post` call to : `http://localhost:7080/realms/master/protocol/openid-connect/token` to get a token`
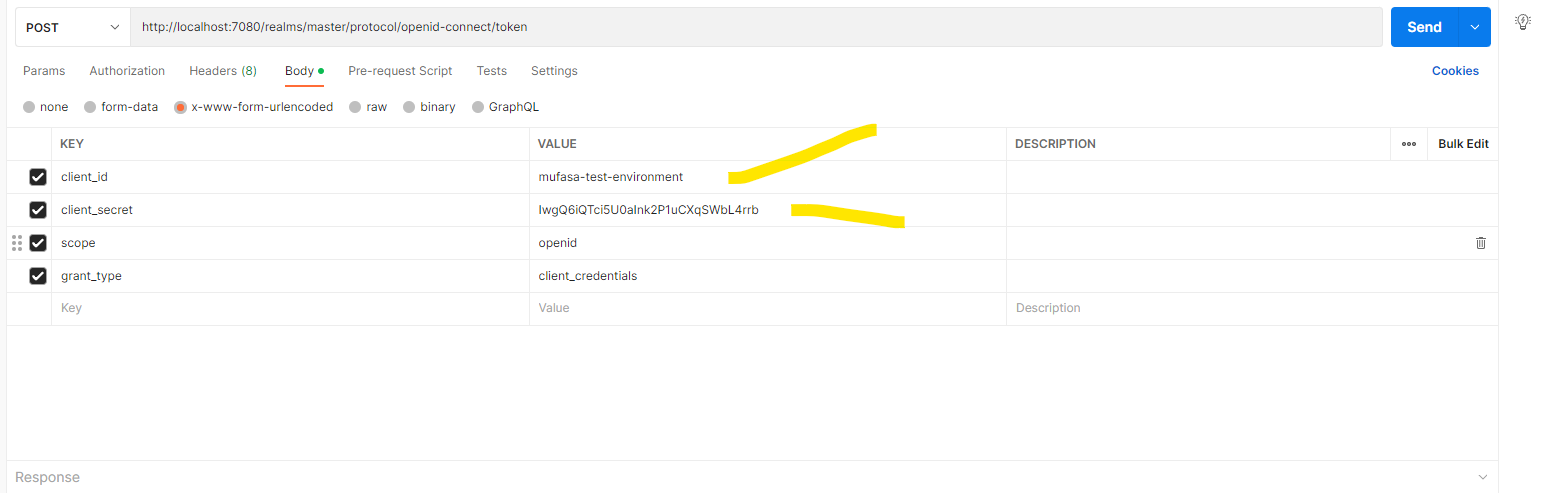
- Call the endpoints using this generated token.
Testing using oauth2 client credentials grant flow
- call any `get` rest API from the browser.
- the URL should be redirected to a keycloak login page.
- login with a user with the required roles to access that resource.
Testing in google cloud platform
- log in to your google cloud platform and select a GKE(Google Kubernetes Engine resource).
- Create a cluster and connect to it in your local terminal.

`Note` :
1. You can choose to deploy each microservice at a time to the kubernetes cluster/ you can use `helm` charts provided in this repo/helm to deploy all the microservices at once.
userful commands to use with Kubernetes and Helm
kubectl scale deployment accounts-deployment --replicas=3

kubectl describe pod <pod name>

kubectl set image deployment accounts-deployment accounts=bobmwas/mufasa:accounts-k8s

kubectl get events --sort-by=.metadata.creationTimestamp

kubectl rollout history deployment accounts-deployment

kubectl rollout undo deployment accounts-deployment --to-revision=1

helm create <chartName>

helm dependencies build

helm template .

helm install <deployment name> <helm env folder>

helm upgrade <deployment name> <helm env folder>

helm history <deployment name>

helm rollback <deployment name> <revision number>

helm uninstall <deployment name>

helm list

gcloud config set project <project name>

docker system prune -a :- removes all stopped containers,un used images cache etc

docker stop $(docker container ls -q) :-stops all running containers